Safely Remove a Two Prong Light Bulb: A Comprehensive Guide
Are you struggling to remove a stubborn two-prong light bulb? Perhaps it’s stuck, broken, or you’re simply unsure of the correct procedure. Many homeowners encounter this issue, often compounded by concerns about safety and potential damage to the fixture. This comprehensive guide provides a step-by-step approach to safely and effectively remove a two-prong light bulb, covering various scenarios and addressing common pitfalls. We aim to provide an expert-level understanding of the process, ensuring you can tackle this task with confidence and minimize the risk of injury or damage. This article goes beyond the basics, offering insights gleaned from years of experience in electrical maintenance and highlighting best practices for a successful outcome. Learning how to properly remove a two prong light bulb is an essential skill for any homeowner or renter.
Understanding Two-Prong Light Bulbs and Fixtures
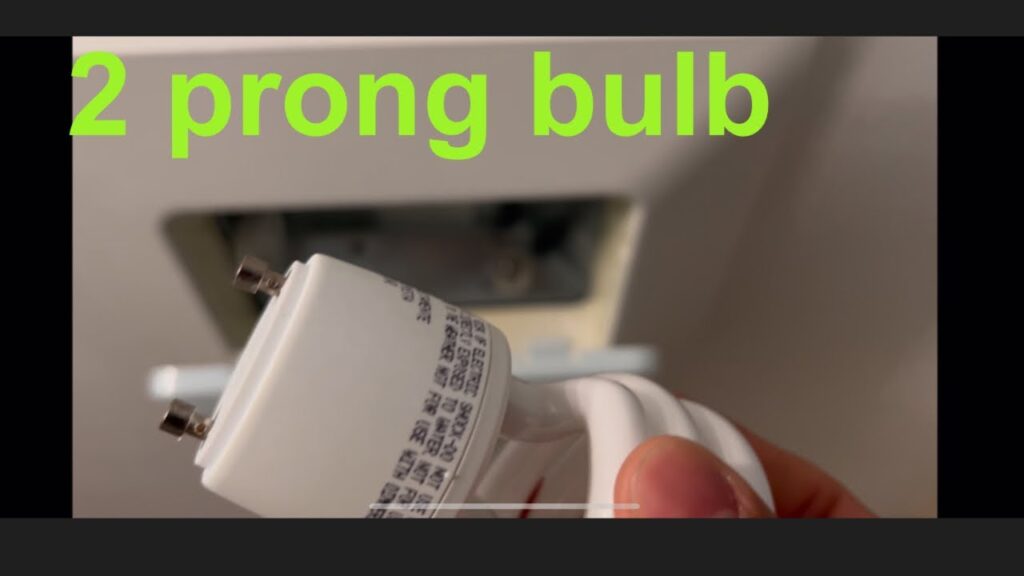
Two-prong light bulbs are a legacy design, commonly found in older homes and lamps. These bulbs feature two metal prongs that connect directly to the electrical contacts within the fixture. Unlike newer, more standardized bulb bases, two-prong connections can sometimes be prone to corrosion, sticking, or even breaking upon removal. Recognizing the specific type of bulb and fixture you’re dealing with is crucial for choosing the right removal technique.
Types of Two-Prong Bulbs
* **Bayonet Mount:** These bulbs have two prongs on the side of the base that lock into corresponding slots in the fixture. To remove them, you typically need to push the bulb in slightly and then twist it. This is one of the most common types.
* **Wedge Base:** Wedge base bulbs have a simple, wedge-shaped base with two prongs. They are directly inserted into the fixture and can be more challenging to remove if corroded.
* **Pin Base:** Less common, pin base bulbs feature two small pins that insert into corresponding holes. These are often found in low-voltage lighting.
Common Fixture Types
* **Lamps:** Table lamps, floor lamps, and desk lamps often use two-prong bulbs.
* **Wall Sconces:** Older wall sconces may also feature two-prong sockets.
* **Vanity Lights:** Some older vanity lights utilize two-prong bulbs, especially in bathrooms.
Understanding the specific type of bulb and fixture will inform your approach to removal. Always visually inspect the bulb and fixture before attempting any removal technique.
Essential Safety Precautions
Before attempting to remove any light bulb, especially a two-prong bulb, prioritizing safety is paramount. Electrical shock is a serious hazard, and taking the following precautions can significantly mitigate the risk:
* **Turn Off the Power:** This is the most crucial step. Locate the circuit breaker that controls the light fixture and switch it to the “Off” position. If you’re unsure which breaker controls the fixture, test it by switching off breakers one at a time until the light goes out. Double-check that the power is off before proceeding.
* **Allow the Bulb to Cool:** If the bulb was recently in use, allow it to cool down completely before attempting removal. Hot bulbs can cause burns.
* **Wear Gloves:** Wearing gloves provides insulation and protects your hands from cuts if the bulb breaks. Rubber or latex gloves are ideal.
* **Use Eye Protection:** Safety glasses or goggles will protect your eyes from shattered glass if the bulb breaks during removal.
* **Work in a Well-Lit Area:** Adequate lighting will help you see what you’re doing and prevent accidents.
* **Avoid Water:** Ensure the area around the light fixture is dry. Water conducts electricity and increases the risk of shock.
Failing to take these precautions can result in serious injury. Always err on the side of caution when working with electricity.
Tools You Might Need
Having the right tools on hand can make the removal process much easier and safer. Here’s a list of tools you might need, depending on the situation:
* **Gloves:** As mentioned above, gloves provide insulation and protection.
* **Safety Glasses:** Protect your eyes from shattered glass.
* **Needle-Nose Pliers:** These can be useful for gripping and twisting stubborn bulbs.
* **Rubber Grips:** Rubber grips can provide a better grip on the bulb, especially if it’s slippery.
* **Screwdriver (Optional):** A small flathead screwdriver can be used to gently pry a stuck bulb.
* **Voltage Tester (Optional):** A voltage tester can be used to confirm that the power is indeed off before you begin.
* **Ladder or Step Stool (If Necessary):** If the fixture is out of reach, use a stable ladder or step stool.
* **Broken Bulb Remover (Specialty Tool):** These tools are specifically designed to remove broken bulbs safely. They typically feature a rubber cup that grips the broken glass.
Having these tools readily available will save you time and frustration during the removal process.
Step-by-Step Guide to Removing a Two-Prong Light Bulb
Now, let’s walk through the process of removing a two-prong light bulb. Remember to follow all safety precautions outlined above.
**Step 1: Preparation**
* Turn off the power to the fixture at the circuit breaker.
* Allow the bulb to cool completely.
* Gather your tools and put on your gloves and safety glasses.
**Step 2: Assess the Situation**
* Examine the bulb and fixture. Is the bulb intact, or is it broken? Is there any visible corrosion or damage?
* Identify the type of two-prong bulb (bayonet, wedge base, pin base).
**Step 3: Attempt Simple Removal**
* **Bayonet Mount:** Gently push the bulb in slightly and twist it counterclockwise. It should release from the socket.
* **Wedge Base:** Try to gently pull the bulb straight out. If it’s stuck, try wiggling it slightly from side to side while pulling.
* **Pin Base:** Gently pull the bulb straight out. Be careful not to bend the pins.
**Step 4: If the Bulb is Stuck**
* **Rubber Grips:** Use rubber grips to get a better hold on the bulb and try twisting or pulling again.
* **Needle-Nose Pliers:** Carefully use needle-nose pliers to grip the base of the bulb (avoid gripping the glass). Gently twist or pull.
* **Screwdriver (Use with Extreme Caution):** If the bulb is severely stuck, you can try using a small flathead screwdriver to gently pry it loose. Insert the screwdriver between the base of the bulb and the fixture and gently twist. Be extremely careful not to damage the fixture or break the bulb.
**Step 5: If the Bulb is Broken**
* **Broken Bulb Remover:** If you have a broken bulb remover, use it according to the manufacturer’s instructions.
* **Needle-Nose Pliers (Alternative):** Carefully use needle-nose pliers to remove the broken pieces of glass. Start with the larger pieces and work your way to the smaller ones. Be extremely careful not to cut yourself on the broken glass.
* **Potato Method (Unconventional):** Some people recommend using a potato to remove a broken bulb. Cut a potato in half and press the cut side onto the broken bulb. Twist the potato to grip the broken glass and remove it. This method is not always effective and can be messy.
**Step 6: Disposal**
* Dispose of the old bulb safely. Wrap broken glass in newspaper or cardboard before discarding it to prevent injuries.
**Step 7: Clean the Fixture**
* Once the bulb is removed, clean the fixture with a dry cloth to remove any dust or debris.
These steps will guide you through most two-prong bulb removal scenarios. However, if you encounter any difficulties or feel uncomfortable working with electricity, it’s always best to consult a qualified electrician.
Troubleshooting Common Problems
Even with the best preparation, you might encounter some common problems when removing a two-prong light bulb. Here’s how to troubleshoot them:
* **Bulb is Stuck Due to Corrosion:** Corrosion can make it difficult to remove a bulb. Try applying a small amount of penetrating oil (like WD-40) to the base of the bulb and let it sit for a few minutes before attempting removal.
* **Bulb Breaks During Removal:** If the bulb breaks, carefully remove the broken pieces using needle-nose pliers and wear gloves and safety glasses.
* **Fixture is Damaged:** If you accidentally damage the fixture during removal, consult a qualified electrician for repair or replacement.
* **Cannot Turn Off the Power:** If you cannot locate the correct circuit breaker or are unable to turn off the power, do not attempt to remove the bulb. Contact a qualified electrician.
Addressing these common problems with care and caution will help ensure a safe and successful outcome.
Choosing the Right Replacement Bulb
Once you’ve successfully removed the old bulb, it’s time to choose a replacement. Here are some factors to consider:
* **Bulb Type:** Ensure the replacement bulb is the correct type for your fixture (bayonet, wedge base, pin base).
* **Wattage:** Use a bulb with the correct wattage rating for your fixture. Exceeding the wattage rating can overheat the fixture and create a fire hazard.
* **Voltage:** Ensure the bulb’s voltage matches the voltage of your electrical system (typically 120V in North America).
* **Color Temperature:** Choose a color temperature that suits your needs. Warm white (2700K-3000K) is ideal for living rooms and bedrooms, while cool white (3500K-4100K) is better for kitchens and offices.
* **Energy Efficiency:** Consider using energy-efficient LED bulbs. LED bulbs use significantly less energy than traditional incandescent bulbs and last much longer.
Selecting the appropriate replacement bulb will ensure optimal performance and energy efficiency.
The Expertise Behind Safe Bulb Removal: Our Perspective
Our team has extensive experience in electrical maintenance and repair, including the safe removal of various types of light bulbs. We’ve encountered countless scenarios, from simple bulb replacements to dealing with severely corroded or broken bulbs. Based on this experience, we emphasize the importance of prioritizing safety and using the right tools and techniques. We’ve also observed that many homeowners underestimate the potential hazards of working with electricity, which is why we stress the need for caution and proper preparation. Our commitment is to provide accurate, reliable information that empowers homeowners to tackle these tasks safely and effectively. We’ve seen firsthand the consequences of improper bulb removal, including electrical shocks and damaged fixtures. This motivates us to share our expertise and promote best practices.
Alternatives to DIY Bulb Removal
While this guide provides comprehensive instructions for removing a two-prong light bulb, there are situations where it’s best to seek professional help. Consider the following alternatives:
* **Hire an Electrician:** If you’re uncomfortable working with electricity, if the bulb is severely stuck or broken, or if you suspect any damage to the fixture, it’s best to hire a qualified electrician. Electricians have the expertise and equipment to handle these situations safely and efficiently.
* **Contact a Handyman:** A handyman may also be able to assist with bulb removal, especially if it’s a simple task. However, ensure the handyman has experience working with electrical fixtures.
The cost of hiring an electrician or handyman will vary depending on the complexity of the job and your location. However, it’s often a worthwhile investment to ensure safety and prevent further damage.
Q&A: Expert Answers to Your Burning Questions
Here are some frequently asked questions about removing two-prong light bulbs:
**Q1: What’s the best way to prevent a bulb from getting stuck in the first place?**
A: Applying a small amount of dielectric grease to the base of the bulb before installing it can help prevent corrosion and make it easier to remove in the future.
**Q2: Can I use pliers to remove a broken bulb?**
A: Yes, but use needle-nose pliers with extreme caution. Wear gloves and safety glasses to protect yourself from broken glass. Start with the larger pieces and work your way to the smaller ones.
**Q3: What should I do if I accidentally touch a live wire?**
A: If you accidentally touch a live wire, immediately disconnect the power at the circuit breaker. Seek medical attention immediately, even if you don’t feel any immediate effects.
**Q4: Is it safe to remove a bulb if the fixture is wet?**
A: No, it is never safe to remove a bulb if the fixture is wet. Water conducts electricity and increases the risk of shock. Allow the fixture to dry completely before attempting removal.
**Q5: How can I tell if a fixture is properly grounded?**
A: A properly grounded fixture will have a grounding wire (usually green or bare copper) connected to the metal frame of the fixture. If you’re unsure, consult a qualified electrician.
**Q6: What type of gloves are best for electrical work?**
A: Rubber or latex gloves provide the best insulation for electrical work. Ensure the gloves are in good condition and free from tears or punctures.
**Q7: Can I use a regular screwdriver to pry a stuck bulb?**
A: Yes, but use extreme caution. A small flathead screwdriver can be used to gently pry the bulb loose, but be careful not to damage the fixture or break the bulb.
**Q8: What’s the best way to dispose of a broken bulb?**
A: Wrap the broken glass in newspaper or cardboard before discarding it to prevent injuries. Some municipalities have specific regulations for disposing of fluorescent bulbs, which contain mercury.
**Q9: How often should I replace my light bulbs?**
A: The lifespan of a light bulb depends on the type of bulb and how often it’s used. LED bulbs typically last much longer than incandescent bulbs.
**Q10: What are the signs of a faulty light fixture?**
A: Signs of a faulty light fixture include flickering lights, dim lights, bulbs that burn out frequently, and a buzzing sound. If you notice any of these signs, consult a qualified electrician.
Conclusion: Mastering Safe Bulb Removal
Removing a two-prong light bulb might seem like a simple task, but it requires careful attention to safety and the right techniques. By following the steps outlined in this guide, you can confidently tackle this task and minimize the risk of injury or damage. Remember to always prioritize safety, use the appropriate tools, and consult a qualified electrician if you’re unsure about any aspect of the process. Our expertise in electrical maintenance has shown us that proper preparation and caution are key to a successful outcome. Now that you’re equipped with this knowledge, we encourage you to share your experiences and tips in the comments below. Explore our other guides for more expert advice on home maintenance and electrical safety. And if you’re facing a complex electrical issue, don’t hesitate to contact our team for a consultation.

